Welcome, Minecraft aficionados and newcomers alike! If you’ve ever found yourself in a situation where you need to weaken an enemy or, more commonly, cure a zombie villager, then you’ve likely heard of the Splash Potion of Weakness. This handy item is not just a staple in any adventurer’s toolkit, but it’s also a key ingredient in some of Minecraft’s more intricate mechanics. In this comprehensive guide, we’ll walk you through the step-by-step process of crafting your very own Splash Potion of Weakness, ensuring you’re well-equipped for whatever challenges lie ahead. So grab your crafting table and let’s get brewing!
Why Use a Splash Potion of Weakness?
Before diving into the nitty-gritty of crafting, let’s explore why a Splash Potion of Weakness is such a valuable item to have in your Minecraft inventory. This potion serves multiple purposes:
- Curing Zombie Villagers: One of the most common uses is to cure zombie villagers. When combined with a golden apple, the Splash Potion of Weakness can transform a zombie villager back into a regular villager, allowing you to repopulate villages or secure better trades.
- Combat Strategy: In PvP (Player vs. Player) or PvE (Player vs. Environment) scenarios, throwing a Splash Potion of Weakness at your enemies can reduce their attack damage, giving you the upper hand in combat.
- Mob Management: If you’re dealing with a mob farm or simply want to make hostile mobs less dangerous, a Splash Potion of Weakness can be your go-to solution.
- Adventure and Exploration: When you’re out exploring dungeons, temples, or any other dangerous locale, having a few Splash Potions of Weakness can make your journey significantly safer.
Understanding its utility can help you better appreciate the time and resources you’ll invest in crafting this potion.
Prerequisites
Before you can start brewing, there are a few essential items and crafting stations you’ll need to prepare. Here’s what you’ll need:
Crafting Table
If you’re new to Minecraft, the crafting table is one of the first items you’ll create. It’s essential for crafting more complex items, including some of the prerequisites for potion-making. To craft a crafting table, you’ll need:
- 4 Wooden Planks (any type)
Place the wooden planks in a 2×2 grid in your personal crafting interface, and voila! You’ve got yourself a crafting table.
Brewing Stand
The Brewing Stand is the cornerstone of all potion-making in Minecraft. To craft a brewing stand, you’ll need:
- 1 Blaze Rod
- 3 Cobblestones or Blackstones
Place the Blaze Rod in the top-middle slot and the Cobblestones or Blackstones along the bottom row of the crafting table interface. This will yield a Brewing Stand.
Ingredients
For a Splash Potion of Weakness, you’ll need the following ingredients:
- 1 Water Bottle (Crafted from Glass Bottles, which are made from Glass Blocks)
- 1 Fermented Spider Eye (Crafted from Spider Eye, Sugar, and Brown Mushroom)
- 1 Gunpowder (Dropped by Creepers or Ghasts)
Once you’ve gathered these ingredients and crafted the necessary stations, you’re ready to dive into the world of potion-making!
Step-by-Step Guide
Now that you’re equipped with the necessary crafting stations and ingredients, it’s time to delve into the step-by-step process of making a Splash Potion of Weakness. Follow these steps carefully, and you’ll be a potion master in no time!
Crafting a Brewing Stand
If you haven’t already crafted a Brewing Stand, here’s how to do it:
- Collect Blaze Rods: Head to the Nether and defeat some Blaze enemies to collect Blaze Rods.
- Mine Cobblestones or Blackstones: You can find these in the Overworld or the Nether, respectively.
- Craft the Brewing Stand: Open your Crafting Table, place one Blaze Rod in the top-middle slot, and place three Cobblestones or Blackstones along the bottom row. This will yield one Brewing Stand.
Making Glass Bottles
Glass bottles are essential for holding the potions you’ll be brewing. Here’s how to make them:
- Collect Sand or Red Sand: Find a beach or a desert to collect sand blocks.
- Smelt the Sand: Place the sand blocks in a furnace with a suitable fuel source (like coal) to create glass blocks.
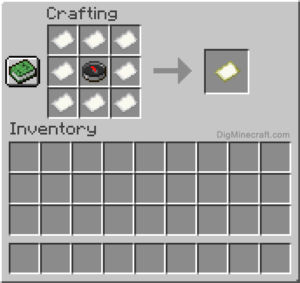
- Craft Glass Bottles: Open your Crafting Table and place three glass blocks in a ‘V’ shape (one block in the bottom-left, one in the bottom-right, and one in the middle row’s center slot). This will yield three Glass Bottles.
Filling Glass Bottles with Water
Before you can brew any potions, you’ll need to fill your Glass Bottles with water:
- Find a Water Source: Locate a water source block or a cauldron filled with water.
- Fill the Bottles: Right-click (or left-trigger, depending on your device) on the water source with the Glass Bottles selected in your hotbar. This will give you Water Bottles.
Creating Awkward Potions
The base for most potions, including the Potion of Weakness, is the Awkward Potion. Here’s how to make it:
- Place the Brewing Stand: Right-click (or left-trigger) to place your Brewing Stand on a block.
- Add Blaze Powder: Open the Brewing Stand’s interface and add Blaze Powder to the leftmost slot to activate the Brewing Stand.
- Insert Water Bottles: Place your Water Bottles in the three bottom slots.
- Add Nether Wart: Place a Nether Wart in the top slot. The brewing process will begin, turning the Water Bottles into Awkward Potions.
Brewing the Potion of Weakness
Now that you have your Awkward Potions, you can brew them into Potions of Weakness:
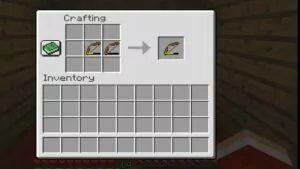
- Prepare Fermented Spider Eye: Craft a Fermented Spider Eye using a Spider Eye, Sugar, and a Brown Mushroom in the Crafting Table.
- Add to Brewing Stand: Replace the Nether Wart in the Brewing Stand’s top slot with the Fermented Spider Eye.
- Brew: The Awkward Potions will transform into Potions of Weakness.
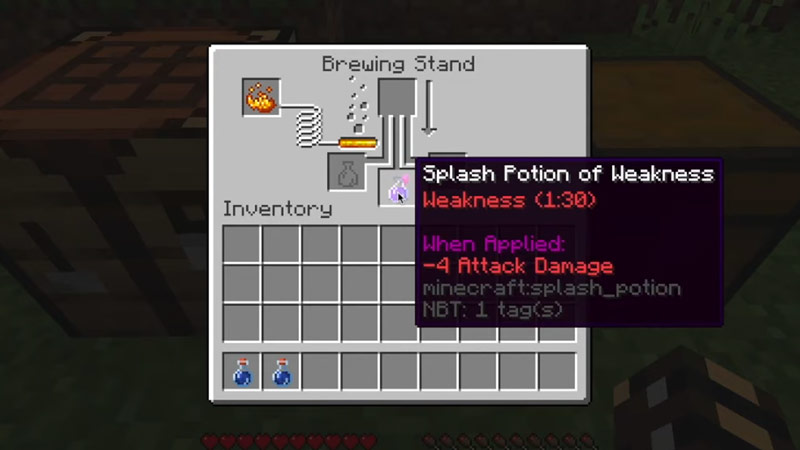
Converting to Splash Potion
The final step is to convert your Potion of Weakness into a Splash Potion of Weakness:
- Collect Gunpowder: Defeat Creepers or Ghasts to collect Gunpowder.
- Add to Brewing Stand: Replace the Fermented Spider Eye in the Brewing Stand’s top slot with Gunpowder.
- Brew: The Potions of Weakness will transform into Splash Potions of Weakness.
Congratulations! You’ve successfully crafted a Splash Potion of Weakness. Whether you’re curing zombie villagers or gaining the upper hand in combat, this potion is sure to be a valuable addition to your Minecraft toolkit.
Usage Scenarios
Now that you’ve successfully brewed your Splash Potion of Weakness, you might be wondering when and where to use it. Here are some common scenarios where this potion can be incredibly useful:
Curing Zombie Villagers
- Locate a Zombie Villager: These can be found randomly in the world, especially at night.
- Trap the Zombie Villager: Use blocks to create an enclosure to keep the zombie villager from wandering off or burning in daylight.
- Apply the Splash Potion: Throw the Splash Potion of Weakness at the zombie villager.
- Feed a Golden Apple: Right-click (or left-trigger) on the zombie villager with a golden apple.
- Wait: The curing process will take some time, but eventually, the zombie villager will transform back into a regular villager.
PvP and PvE Combat
- Engage in Combat: Whether you’re in a PvP duel or fighting hostile mobs, get ready to throw your Splash Potion.
- Aim and Throw: Aim the Splash Potion of Weakness at your target and throw it.
- Follow Up: Use this opportunity to attack while your opponent is weakened.
Mob Management
- Locate the Mob: Find the mob you want to weaken.
- Throw the Potion: Use the Splash Potion of Weakness on the mob to reduce its attack power.
- Proceed Carefully: Now that the mob is weakened, you can choose to either avoid it or defeat it more easily.
Common Mistakes and Troubleshooting
Even seasoned Minecraft players can run into issues while brewing potions. Here are some common mistakes and how to troubleshoot them:
Wrong Ingredients
- Problem: The potion isn’t brewing, or you end up with a different potion.
- Solution: Double-check that you’ve used the correct ingredients in the correct order. Remember, for a Splash Potion of Weakness, you’ll need an Awkward Potion first, followed by a Fermented Spider Eye, and finally, Gunpowder.
Brewing Stand Not Working
- Problem: The Brewing Stand isn’t brewing anything.
- Solution: Make sure you’ve added Blaze Powder to activate the Brewing Stand.
Failed to Cure Zombie Villager
- Problem: The zombie villager isn’t turning back into a villager.
- Solution: Ensure you’ve used both the Splash Potion of Weakness and a Golden Apple. Also, make sure to give the transformation process enough time; it can take several minutes.
Splash Potion Didn’t Work in Combat
- Problem: You threw the Splash Potion, but it didn’t seem to have any effect.
- Solution: Make sure you’re close enough to your target when throwing the potion, and aim well to ensure it hits.
By avoiding these common pitfalls and understanding how to troubleshoot them, you’ll be a master of Splash Potions of Weakness in no time!
7 Additional Tips for Crafting and Using Splash Potions of Weakness
To make your potion-crafting journey even more fruitful and your gameplay more strategic, here are seven additional tips that you won’t want to miss:
1. Biome-Specific Tips for Ingredient Gathering
If you’re having trouble finding brown mushrooms for your Fermented Spider Eye, head to a Dark Oak Forest or Swamp biome. These biomes often have a higher spawn rate for brown mushrooms, making your ingredient hunt much easier.
2. Safety Precautions with Mobs
When you’re out collecting ingredients like Blaze Rods or Gunpowder, remember to exercise caution. Blazes shoot fireballs, and Creepers explode, so make sure you’re well-armored and have a good weapon at hand. Keeping a bucket of water can also be a lifesaver when dealing with fire-based mobs like Blazes.
3. Crafting Table Not Always Required
For some simpler recipes like the Fermented Spider Eye, you don’t actually need a crafting table. You can craft it directly from your personal 2×2 crafting grid, saving you the trouble of placing and using a crafting table.
4. Edition-Specific Differences
The effect of the Weakness debuff varies between the Bedrock and Java editions of Minecraft. In Bedrock, the debuff reduces damage by only 0.5 hearts, while in Java, it’s a more significant reduction of two whole hearts. Keep this in mind when planning your strategies.
5. Creative Solutions and Experimentation
Don’t limit the use of your Splash Potion of Weakness to just curing zombie villagers or weakening enemies. Experiment with different scenarios where the potion could be useful. For example, you could use it to make a mob farm less dangerous or to create unique challenges in custom game modes.
6. Potion Effects on Mobs
Splash Potions aren’t just for players; they can also affect mobs. Consider using your Splash Potion of Weakness in mob farms to reduce the threat level of gathered mobs, or use it strategically in boss fights to make your life a little easier.
7. Visualizing the Process
While this guide doesn’t include pictures, you can easily visualize each step by reading carefully and perhaps even sketching out your own diagrams or flowcharts. This can help you internalize the process, making it easier to remember for future crafting sessions.
By incorporating these additional tips into your Minecraft gameplay, you’ll become a more versatile and strategic player, fully equipped to make the most out of your Splash Potions of Weakness.
Conclusion
Congratulations, you’ve successfully navigated the intricate world of potion-making in Minecraft to craft your very own Splash Potion of Weakness! Whether you’re looking to cure zombie villagers, gain an advantage in combat, or simply explore the vast mechanics of Minecraft, this potion is a versatile and valuable addition to your in-game toolkit. We’ve covered everything from gathering the right ingredients to common mistakes and troubleshooting, ensuring that you’re well-equipped for your Minecraft adventures. Happy brewing!
FAQs
What can I do if I run out of Blaze Powder?
- If you’re out of Blaze Powder, you’ll need to venture back into the Nether to defeat some Blazes and collect more Blaze Rods. You can then convert these into Blaze Powder in your Crafting Table.
Can I make a Splash Potion of Weakness without a Brewing Stand?
- A Brewing Stand is essential for making any kind of potion, including the Splash Potion of Weakness. There’s no alternative method for brewing potions without it.
How long does the effect of the Splash Potion of Weakness last?
- The standard Splash Potion of Weakness lasts for 1 minute and 7 seconds. However, you can extend the duration by adding Redstone during the brewing process.
Can I stack Splash Potions of Weakness in my inventory?
- Yes, you can stack up to 64 Splash Potions of Weakness in a single inventory slot.
What happens if I drink a Potion of Weakness instead of making it a splash potion?
- If you drink a Potion of Weakness, the effect will apply to you, reducing your melee attack damage for the duration of the potion’s effect.
Can I cure a zombie villager in Creative mode?
- Yes, the process for curing a zombie villager is the same in both Survival and Creative modes. Simply use the Splash Potion of Weakness and a Golden Apple as you would in Survival mode.
Is it possible to automate the potion-making process?
- While you can’t fully automate potion-making, you can use Redstone and Hoppers to streamline some parts of the process, such as ingredient placement and bottle filling.
By addressing these frequently asked questions, we hope to clear up any remaining uncertainties you may have. If you have more questions or need further clarification, feel free to ask. Happy Minecrafting!